Skip to content
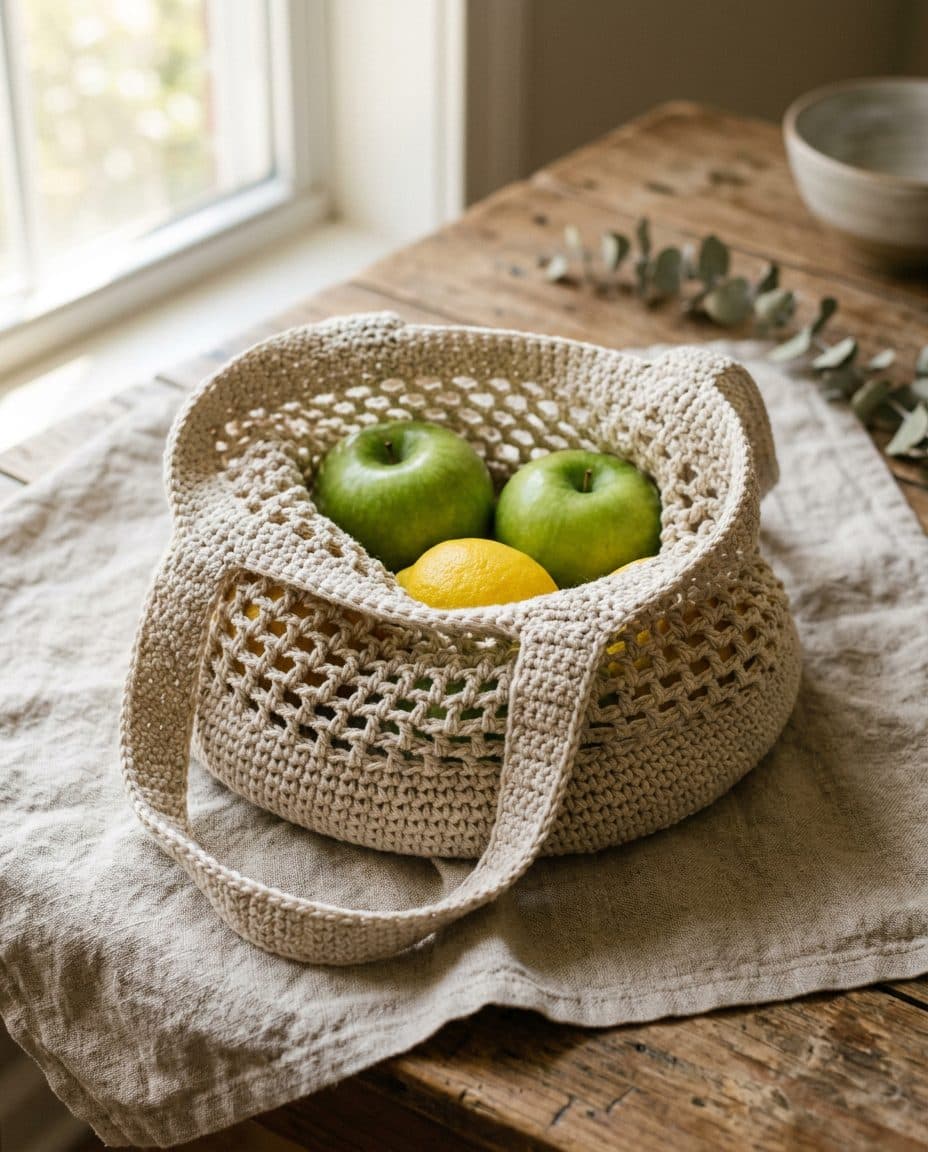
Farmers Market Mesh Bag, preview render
Preview render

Free crochet pattern · easy · worsted weight

Farmers Market Mesh Bag

A sturdy, expandable open-mesh market bag crocheted in the round from a flat circular base, with integrated single-crochet handles. Perfect for carrying produce and everyday essentials.

Plastic-bag replacement

Finished / weight

Approx. 13 in wide × 14 in tall (unstretched), expandable to hold a full grocery load

Gauge

14 sc × 16 rows = 4 in (10 cm) in single crochet with H-8 (5.0 mm) hook

Yarn

Worsted weight, 220 yards, cotton or linen recommended for durability and stretch retention

Needles / hooks

H-8 (5.0 mm) crochet hook

Notions

Stitch marker, tapestry needle, scissors

Abbreviations

ch = chainsc = single crochetsl st = slip stitchst = stitchsts = stitchessp = spacech-sp = chain spaceRS = right sidepm = place markersm = slip markerrep = repeatrnd = roundbeg = beginningrem = remainingapprox = approximatelyMR = magic ring

Base — Flat Circle

Rnd 1Make a MR. Ch 1 (does not count as st), work 6 sc into MR, pull ring closed, sl st to first sc to join. Pm in first st of each rnd and move up as work progresses.6 sts
Rnd 2Ch 1, 2 sc in each st around, sl st to first sc to join.12 sts
Rnd 3Ch 1, *2 sc in next st, sc in next st; rep from * around, sl st to first sc to join.18 sts
Rnd 4Ch 1, *2 sc in next st, sc in next 2 sts; rep from * around, sl st to first sc to join.24 sts
Rnd 5Ch 1, *2 sc in next st, sc in next 3 sts; rep from * around, sl st to first sc to join.30 sts
Rnd 6Ch 1, *2 sc in next st, sc in next 4 sts; rep from * around, sl st to first sc to join.36 sts
Rnd 7Ch 1, *2 sc in next st, sc in next 5 sts; rep from * around, sl st to first sc to join.42 sts
Rnd 8Ch 1, *2 sc in next st, sc in next 6 sts; rep from * around, sl st to first sc to join.48 sts
Rnd 9Ch 1, *2 sc in next st, sc in next 7 sts; rep from * around, sl st to first sc to join.54 sts
Rnd 10Ch 1, *2 sc in next st, sc in next 8 sts; rep from * around, sl st to first sc to join.60 sts

Transition Row — Sidewall Setup

Rnd 11Ch 1, sc in each st around, sl st to first sc to join. This rnd establishes the side of the bag; the work now rises vertically.60 sts

Mesh Body

Rnd 12Ch 4 (counts as first sc + ch-3 sp here and throughout mesh rnds), skip next 2 sts, *sc in next st, ch 3, skip next 2 sts; rep from * around to last 2 sts, sc in next st, ch 1, hdc in top of beg ch-4 to close rnd and form last ch-sp. (20 ch-sps)
Rnds 13–25Ch 4, *sc in next ch-sp, ch 3; rep from * around, ending sc in last ch-sp, ch 1, hdc in top of beg ch-4 to close rnd. (20 ch-sps)(13 rows)

Top Rim

Rnd 26Ch 1, work 3 sc into each ch-sp around, sl st to first sc to join. (60 sc)60 sts
Rnds 27–28Ch 1, sc in each st around, sl st to first sc to join. (60 sc)(2 rows)

Handles

Handle Setup — First HandleWith RS facing, count 15 sts from beg-of-rnd marker. Join yarn with sl st in that 15th st. Ch 1, sc in same st, sc in next 14 sts (sts 15–29 of rim). Ch 30 for handle arch, skip 15 sts on rim (sts 30–44), sc in next st (st 45). Do not turn; sl st in same st to secure. Fasten off.
Handle Setup — Second HandleWith RS facing, skip 7 rem sts after the first handle skip section. Join yarn with sl st in the first st of the 8-st gap (st 46), ch 1, sc in same st, sc in next 14 sts (sts 46–60). Ch 30 for handle arch, skip 15 sts on rim (sts 1–14 of beg section, wrapping to start), sc in next st. Do not turn; sl st in same st to secure. Fasten off.
Handle Reinforce — First Handle, Pass 1 (RS)Join yarn with sl st at right base of first handle arch (at the junction of rim and ch-30 arch). Ch 1, work 30 sc evenly along the ch-30 arch to the other side, sl st into rim at opposite end of arch. Do not fasten off; continue to Pass 2.
Handle Reinforce — First Handle, Pass 2Turn work. Ch 1, sc in each of the 30 sc along the handle arch just worked, sl st into rim at end. Fasten off.
Handle Reinforce — Second Handle, Pass 1 (RS)Join yarn with sl st at right base of second handle arch. Ch 1, work 30 sc evenly along the ch-30 arch to the other side, sl st into rim at opposite end of arch. Do not fasten off; continue to Pass 2.
Handle Reinforce — Second Handle, Pass 2Turn work. Ch 1, sc in each of the 30 sc along the handle arch just worked, sl st into rim at end. Fasten off.

Finishing

Weave in all ends securely using a tapestry needle, pulling tails through several sts in different directions to prevent unraveling. Wet-block the bag by soaking in cool water, gently squeezing out excess water (do not wring), and shaping to finished dimensions on a flat surface. Allow to dry completely before use. The mesh will open up beautifully once blocked.

Notes

Cotton or linen yarn is strongly recommended over acrylic as it holds the expanded mesh shape better under the weight of groceries and returns to shape after stretching. If you prefer a longer bag, continue the mesh body (Rnds 12–25 pattern) for additional rounds before working the Top Rim — each additional pair of mesh rounds adds approximately 1 inch of length. The ch-4 + closing-hdc method of working mesh in the round creates a seamless, tidy join; the hdc sits at the same height as sc + ch-3 so the mesh sps are even. For extra handle strength, a third reinforcement pass of sc can be added. Gauge is measured in sc for base construction; the mesh body will be more open — trust the sc gauge for sizing.

Knit this row by row — free

SkeinSmart keeps your place in any pattern, syncs across devices, and turns your yarn stash into a shopping list. Describe a project and get your own pattern in seconds.

Start tracking this pattern →

AI-drafted, human-run · this version drafted Oct 10, 2026. Always swatch and verify stitch counts before casting on.